
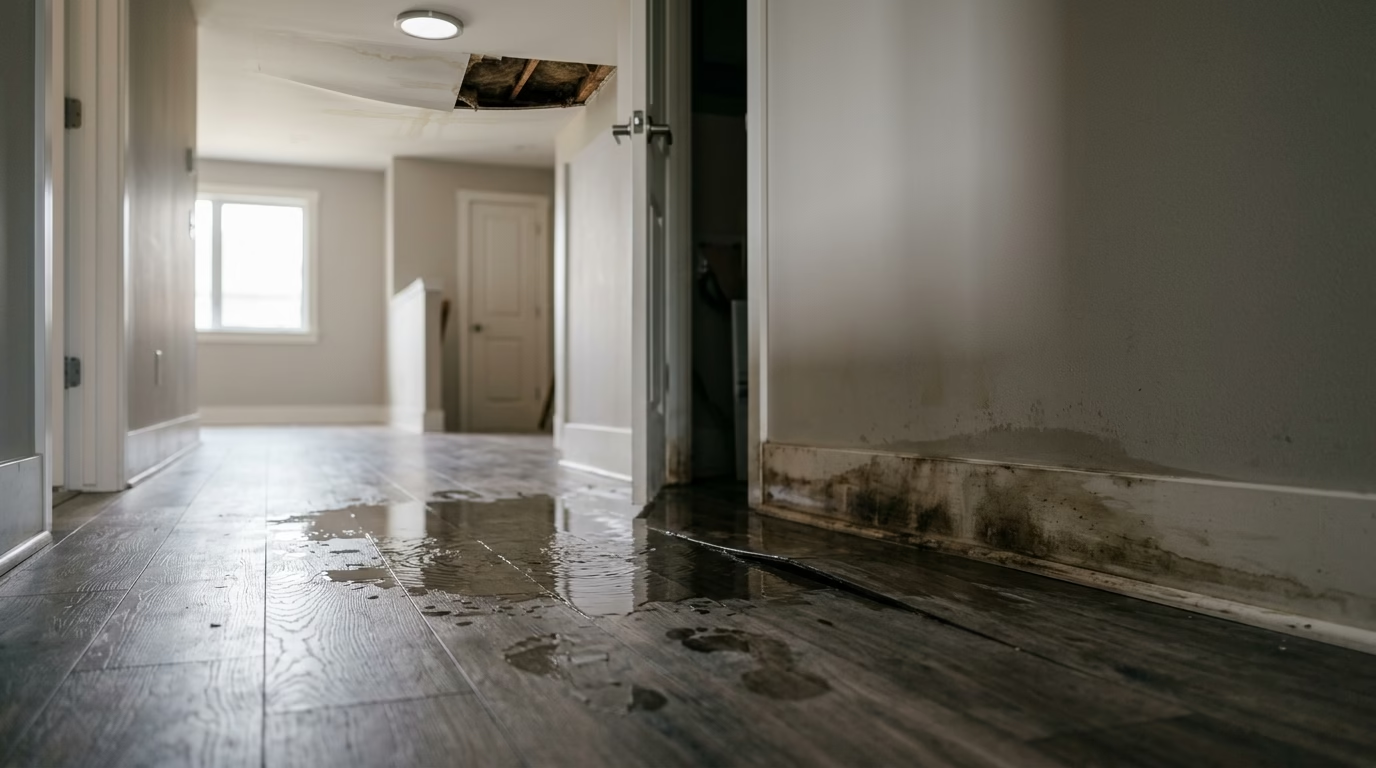
A 1/8-inch crack in a water line can release up to about 250 gallons of water a day, and the damage accelerates fast. In the first 48 hours, that moisture can soak insulation, wick into drywall and framing, and create the perfect conditions for microbial growth—turning a simple plumbing repair into a full restoration job. Understanding the burst pipe damage timeline matters because delays often mean more demolition, longer drying times, and tougher insurance documentation. Even “clean” Cat 1 water can degrade as it sits, spreading contaminants and odors through porous materials. This article breaks down what typically happens hour by hour, what to do immediately, and how to limit costs and protect your home.
What the Burst Pipe Damage Timeline Looks Like in the First 48 Hours
This burst pipe damage timeline breaks down what typically happens to common building materials and systems in the first 48 hours after a pipe fails. The goal is simple: show why “waiting a day or two” often turns a manageable dry-out into a larger demolition, mold, and electrical safety problem.
0–12 Hours: Saturation, Wicking, and Early Electrical Risk
In the first few hours, water spreads fast—under baseboards, behind cabinets, and through subfloors—often long before you see it. Drywall wicks moisture upward (especially at seams), insulation loses R-value as it gets wet, and engineered wood begins to swell at edges. If the source is hot water, heat can accelerate material breakdown and humidity; if the home is cold (near freezing temperatures), the leak may be intermittent as lines thaw and refreeze. Electrical risk increases immediately when water reaches outlets, junctions, appliances, or recessed lighting—shut off power to affected areas and avoid standing water.
12–48 Hours: Swelling, Delamination, and Mold Conditions
By the 12–24 hour mark, cabinets and vanities can start to warp, MDF toe-kicks soften, and laminate flooring may cup or separate at joints. Between 24–48 hours, moisture trapped under tile, vinyl, or floating floors can keep humidity elevated even if the surface “looks dry.” This is also when microbial risk climbs—especially if the water is anything other than clean supply water. For industry definitions and recommended response practices, see the IICRC S500 Water Damage Restoration standard overview (https://iicrc.org/s500/).
- 0–2 hours: Water spreads into wall cavities and under flooring; drywall begins wicking and paint may blister. If the water contacts electrical components, the shock/fire hazard can be immediate.
- 2–12 hours: Cat 1 (clean supply line) can become contaminated as it passes through insulation, dust, or debris; carpets and pad begin holding gallons of water, and subfloors start absorbing.
- 12–24 hours: Cabinets, trim, and engineered wood show swelling; insulation stays wet and traps moisture; dehumidification and air movement become harder without professional drying strategy.
- 24–48 hours: Higher likelihood of Category 2 or 3 conditions if sewage, dishwasher/washer discharge, or outdoor water is involved; mold growth can start on damp cellulose materials, and more drywall/flooring may require removal.
Pro Tip: Take wide and close-up photos of the source, the wet materials, and the water line on walls, then call your carrier (State Farm, Allstate, USAA, Farmers, Liberty Mutual, or a regional insurer) the same day—delayed notice can complicate coverage and drying authorization.
If you’re unsure whether you’re dealing with a straightforward dry-out or a demolition-level loss, start with immediate shutoff and a documented inspection. For next steps and urgent referral options, see burst pipe repair—the sooner drying equipment is properly sized and placed, the more materials you can often save within that first 48-hour window.
How to Take Immediate First Steps After a Pipe Bursts
This section covers the fastest, safest actions to take in the first minutes after a pipe bursts—before cleanup starts and before the burst pipe damage timeline gets expensive. Your goal is to stop the water source, reduce electrical hazards, and preserve evidence for your plumber and insurance adjuster.
Stop the water fast (and safely) to slow the damage timeline
Every minute of active flow can turn a small leak into a full saturation event that may escalate from IICRC S500 Category 1 (clean water) to Category 2 or 3 once it contacts building materials or sewage. Start by shutting off the main water valve (often at the meter or where the service line enters the home), then open a few cold faucets to relieve pressure. If the burst is on a fixture supply line, use the local stop valve first, but don’t waste time hunting for it if water is spreading.
- Shut off the main water immediately; if you’re unsure, locate the meter box outside and turn the valve clockwise.
- Kill power to affected areas at the breaker if water is near outlets, light fixtures, or appliances—do not step into standing water to reach a panel.
- Stop active flow at the point of failure when possible (e.g., close a toilet angle stop, washing machine valves, or water heater inlet).
- Call for emergency plumbing and request a temporary “stop-the-bleed” repair (cap, clamp, or section replacement) while you plan the permanent fix.
Many carriers expect you to take “reasonable steps” to prevent additional damage after a loss; this is standard policy language. For general guidance on limiting further damage and documenting a claim, review the FTC’s overview of filing insurance claims: https://consumer.ftc.gov/articles/how-file-insurance-claim.
Manage electrical risk, document everything, then start controlled drying
Once water is stopped, prioritize safety and documentation. If water has reached electronics, HVAC returns, or a panel, treat the area as energized until a qualified professional confirms it’s safe. Then take photos/video of the source, wet materials, and any visible waterlines before moving items—this helps with carriers like State Farm, Allstate, USAA, Farmers, or Liberty Mutual.
- Photograph the failure and impact zones (wide shots, close-ups, and serial numbers on appliances).
- Record timing: when you discovered it, when water was shut off, and when drying began—critical in the burst pipe damage timeline.
- Begin basic water removal (towels, wet/dry vac) and increase airflow; professional dehumidification often runs 3–5 days depending on saturation and materials.
- Separate wet contents (rugs, textiles, paper goods) and avoid running central HVAC if ducts/returns are wet or contaminated.
Pro Tip: If temperatures are at or below 32°F and you suspect freezing caused the break, leave faucets slightly open after the main is restored and have a plumber evaluate vulnerable runs (exterior walls, crawlspaces) before re-pressurizing—hidden splits in PEX or copper can reopen under pressure.
If you need help coordinating emergency plumbing and the next steps, start here: burst pipe repair. If you’re trying to understand what drying, demolition, and rebuild may involve, use this resource: restoration costs.
How to Contain and Stabilize the Loss While You Wait for Help
This section walks you through practical steps to slow the burst pipe damage timeline while you’re waiting for a plumber or restoration crew. The goal is simple: reduce how far water travels, how long materials stay wet, and how quickly clean water can degrade into a more contaminated loss under IICRC S500 guidelines.
Stop the spread and remove as much water as you safely can
First, shut off the water at the main and relieve pressure by opening the lowest cold tap in the home, then isolate power if water is near outlets, panels, or appliances. Standing water and saturated carpet pad can wick for hours, so quick extraction matters more than most people think. If the source is clean supply water, you’re initially dealing with Category 1—but the longer it sits, the more likely it is to pick up soils and microbes and shift toward Category 2 or Category 3 conditions.
- Extract what you can in the first 1–4 hours: use a wet/dry vac (not a household vacuum) and focus on low spots, carpet edges, and under cabinets where water hides.
- Isolate wet materials: pull up area rugs, remove wet pads if accessible, and place aluminum foil or plastic under furniture legs to prevent staining and swelling.
- Protect surfaces: move artwork/paper items off the floor; wipe baseboards and hard surfaces to remove residues that can feed microbial growth.
- Document for insurance: take wide shots and closeups, and keep receipts for supplies; carriers like State Farm, Allstate, USAA, Farmers, and Liberty Mutual often request proof of “reasonable mitigation.”
Control humidity and prevent a Category 1 loss from escalating
After you’ve stopped the flow and removed bulk water, focus on drying conditions. Open doors inside the affected area to improve airflow, but keep the impacted space separated from clean areas if there’s any chance of sewage, toilet overflow, or “dirty” water. If you have dehumidifiers and fans, run them continuously and keep HVAC running only if it’s safe and not spreading contaminants.
- Airflow basics: point fans across wet surfaces (not straight down into carpet) to encourage evaporation without driving water deeper into assemblies.
- Dehumidification target: aim to keep indoor humidity trending down; if RH stays high for a full day, drying slows and microbial risk rises.
- Temperature threshold: keep the area warm (roughly 68–75°F) when possible—cold air holds less moisture, and drying can stall.
- Know when to stop DIY: if water touched a toilet base, floor drain, or backed up from a tub/shower, treat it as potential Category 3 and avoid spreading it.
Pro Tip: If you can’t get professional extraction the same day, focus on removing wet carpet pad and baseboard “traps” (where water sits unseen). That one step often reduces secondary damage and the odds of a Category 1 loss turning into a demolition job.
For more on how water categories are defined and why they matter for drying and safety, review the IICRC S500 standard overview here: https://iicrc.org/s500/. When you’re ready to bring in help, see what to expect from a qualified response team on our burst pipe repair page, including what documentation and stabilization steps support a smoother claim.
When Waiting 48 Hours Changes the Type of Damage (Mold, Sewage, Hidden Moisture, and Structural Issues)
This section breaks down how a 48-hour delay can shift a simple cleanup into a much bigger restoration job. On a burst pipe damage timeline, the first day is mostly about water removal—after that, you’re often dealing with microbial growth risk, hidden moisture migration, and structural weakening that’s harder (and costlier) to prove, dry, and repair.
How the burst pipe damage timeline escalates after the first day
In the first 24 hours, many losses can remain in the IICRC S500 “clean water” lane (Category 1) if the source is a domestic supply line and the area is dried quickly. Past 48 hours, even originally clean water can become contaminated as it wicks through dust, building materials, and affected contents—changing the scope of cleaning and what materials must be removed. That’s when you start seeing wet insulation, trapped water under floors, and ceilings that soften and sag under load. For standards and definitions, see the IICRC S500 reference page: https://iicrc.org/iicrcstandards/.
- 0–24 hours: Best window for extraction + structural drying (air movers, dehumidifiers) with fewer tear-outs; many claims with carriers like State Farm, Allstate, USAA, Farmers, or Liberty Mutual stay more straightforward when mitigation starts immediately.
- 24–48 hours: Moisture spreads into drywall seams, baseplates, and subfloors; wet fiberglass insulation often loses R-value and can trap moisture against framing.
- 48+ hours: Higher risk of microbial growth and odor; swelling hardwood/laminate edges and delamination become more likely, increasing demolition and rebuild needs.
- Category shifts: A supply-line break may begin as Cat 1, but backups, overflow from a toilet, or sump failure can be Cat 2/3 immediately—changing PPE, containment, and disposal requirements.
Edge cases that make a 48-hour delay especially expensive
Some scenarios turn severe fast—especially when water is trapped where you can’t see it. Water under tile, behind cabinets, or inside wall cavities can keep materials above safe moisture levels even if surfaces look “dry.” And in cold weather, if a pipe burst was caused by freezing conditions (often below 32°F), you may also be dealing with multiple fractures along the line—meaning the leak can restart after a temporary shutoff if the plumbing isn’t properly repaired.
Pro Tip: If water touched a ceiling, don’t assume it’s stable—look for bulging, staining, or new cracks, and keep people out of that room until a pro can assess and, if needed, perform a controlled drain to prevent collapse.
If you’re trying to map costs to the burst pipe damage timeline, our team can help you understand typical mitigation vs. rebuild scope and what documentation insurers expect—see restoration cost factors. If the source line is still at risk (PEX, copper, appliance feed, or a failed fitting), prioritize stopping the leak and getting proper repairs documented at burst pipe repair.
Should You Call an IICRC-Certified Restoration Pro and a Licensed Plumber (and What Happens Next)
This section explains how the right pros handle a burst pipe damage timeline—starting with stopping the leak and ending with verified dry-out and repairs. The goal is to prevent secondary damage (swelling, microbial growth, corrosion) while building solid documentation for your insurance claim.
Why you need two pros: mitigation vs. the actual pipe repair
An IICRC-certified restoration team focuses on emergency mitigation and drying to IICRC S500 standards, while a licensed plumber fixes the failure point (split copper/PEX, failed fitting, pinhole leak, frozen line, slab leak). Restoration can’t fully succeed if water is still active or pressure testing isn’t done. Likewise, a plumber can replace pipe but won’t typically perform moisture mapping, calculate equipment loads, or monitor drying. If you’re weighing next steps, see our burst pipe repair page for what to expect from the plumbing side.
What happens next: the professional handoff and the first 72 hours
Once the water is shut off and the source is isolated, restoration shifts into controlled mitigation and documentation. Teams will classify the loss (Category 1/2/3 water) and identify affected materials so drying is targeted—not guesswork. For the burst pipe damage timeline, the first 24–48 hours often decides whether you’re drying in place or removing materials.
- Emergency mitigation (0–4 hours): Water extraction, protecting contents, and immediate stabilization (power safety, wet-vac/extractors). If temps are near freezing, plumbers may recommend maintaining indoor heat above ~55°F to reduce refreeze risk while repairs are staged.
- Moisture mapping (same day): Non-invasive and pin meter readings, thermal imaging where appropriate, and a room-by-room moisture log that becomes part of your claim file.
- Drying plan (Day 1–3+): Equipment set (air movers, dehumidifiers, containment as needed) with daily monitoring. Many clean-water (Category 1) losses dry in ~3–5 days, but longer timelines are common with dense materials, insulation saturation, or limited airflow.
- Controlled demolition (as needed): Removal of wet drywall, baseboards, insulation, or flooring when it won’t dry efficiently or when contamination is present (Category 2/3). This reduces the risk of odor and microbial growth and allows drying of framing.
- Plumbing repair scope: Plumber documents cause and repair (section replacement, fitting rebuild, pressure test, valve replacement). Expect separate invoices for mitigation/drying and plumbing repair; either may include line-item totals that can land anywhere from hundreds to several thousands of dollars depending on access, materials, and extent.
Pro Tip: Ask both teams to share their photo log, moisture readings, drying notes, and the plumber’s cause-and-origin summary before you sign off—this package is what most carriers (State Farm, Allstate, USAA, Farmers, Liberty Mutual) rely on to validate scope and timing.
For insurance, keep communication factual: when you discovered the leak, when water was shut off, what areas were wet, and what steps were taken to prevent further damage. Documentation standards vary, but the overall claim process is commonly described by the NAIC; see NAIC guidance on filing a homeowners insurance claim. If you want to understand how drying, demo, and rebuild costs typically break down, review restoration costs.
Key Takeaways
Waiting even 48 hours after a burst pipe can turn a manageable cleanup into a major water damage and mold loss with higher repair and insurance complications.
| Point | Details |
|---|---|
| First 48-hour damage timeline | Within hours, water wicks into drywall, flooring, and insulation; by 24–48 hours, swelling, warping, and odor indicate deeper saturation. |
| Immediate first steps | Shut off the main water, cut power to wet areas if safe, document damage, and call a licensed plumber and restoration provider. |
| Contain and stabilize while waiting | Move valuables, elevate furniture, extract standing water, start air circulation, and remove wet rugs—don’t trap moisture by closing rooms. |
| How damage changes after 48 hours | Delays can shift clean water (Category 1) toward Category 2/3 contamination, increase mold risk, and create hidden moisture in cavities. |
| Calling IICRC + plumber: what’s next | An IICRC-certified crew assesses moisture, sets drying/dehumidification, and provides documentation for insurance while the plumber repairs the failed line. |
What we've learned from watching homeowners handle this wrong
Most people think the “real damage” starts when ceilings stain or floors buckle. In reality, the clock starts the minute a supply line lets go and pressurized water keeps feeding the mess. We’ve walked into homes 48 hours later where the visible puddle looked manageable, but the walls, cabinets, and subfloor were already saturated. That’s when drying gets slower, tear-out gets bigger, and the insurance conversation gets harder.
Mistake #1 is waiting to shut the water off at the main and relieve pressure. We’ve seen homeowners try to “find the leak” for 20–30 minutes while a 1/2-inch line is dumping water behind a vanity, then they call after the drywall turns soft. At typical residential pressure, you can be looking at 10–20 gallons per minute—so even 15 minutes can mean 150–300 gallons in places you can’t see. By the time we arrive, the wet area isn’t one room anymore; it’s the wall cavity, the hallway baseboards, and the ceiling below.
Mistake #2 is thinking fans and a shop vac count as drying. A box fan will move air, but it won’t pull moisture out of framing or insulation, and it can spread contamination if the water is Cat 2 or Cat 3 (like an overflow or sewage). We’ve had calls where the homeowner ran fans for two days, then we find the studs are still reading wet and the bottom plates are starting to odor. That’s when proper dehumidification, containment, and sometimes removal of wet insulation becomes unavoidable.
Mistake #3 is delaying documentation and the insurance claim. People clean up first, throw away wet materials, and then can’t show what happened or when, which can complicate “sudden and accidental” coverage. We’ve seen $2,500 turn into $12,000 because drying wasn’t started fast, and mitigation wasn’t clearly documented. Photos, a quick call to the carrier, and an IICRC-aligned mitigation plan make a real difference.
What actually matters is preparation: know where your main shutoff is, keep a basic wrench and towels handy, and don’t guess on drying. If you can’t stop the water in under 2 minutes, it’s already an emergency. The best outcome we see is when homeowners shut it down fast, call a licensed plumber to fix the source, and get a qualified restoration crew in before the 48-hour mark turns into demolition.
— A-Star Restoration
A-Star Restoration is ready when you need emergency help
If you’re staring at a burst pipe and the clock is already ticking, A-Star Restoration can connect you with emergency help 24/7. Waiting 48 hours can push damage from a simple cleanup into a full Water Damage situation—wet insulation, swollen drywall, and hidden moisture that feeds mold. Our nationwide referral network can help you get a qualified crew on-site fast to stop the source, assess Cat 1/2/3 water conditions, and start professional drying. When you need immediate action, start with burst pipe repair to reduce secondary damage.
After the water is contained, the next priority is documentation and a plan that aligns with your insurance claim. Many jobs require moisture mapping, dehumidification, and IICRC-aligned protocols to protect structural materials and contents. If you’re trying to understand what comes next, our restoration costs resource can help you prepare for the real-world scope of drying, repairs, and timelines. A-Star Restoration is here to help you move from emergency to recovery with less stress.
FAQ
What is a burst pipe damage timeline and why do the first 48 hours matter?
A burst pipe damage timeline moves fast: in the first hour, water spreads under flooring and into drywall; by 24 hours, swelling and staining worsen; by 48 hours, IICRC-certified drying often becomes a larger demolition-and-dryout job, and mold risk rises in damp materials. That delay can push a $1,000–$3,000 cleanup into $5,000–$20,000+ restoration, depending on Cat 1/2/3 water conditions. Carriers like State Farm, Allstate, USAA, Farmers, and Liberty Mutual typically expect prompt mitigation and documentation—call for burst pipe repair immediately.
How much more expensive is it if I wait 48 hours to deal with burst pipe water damage?
Waiting 48 hours can turn a simple Cat 1 water cleanup into a Cat 2–3 loss (sewage risk), driving costs from roughly $1,500–$5,000 to $8,000–$25,000+ if drywall, flooring, cabinets, and mold remediation are involved. IICRC-certified drying typically needs 3–7 days once equipment is set, but delays often mean heavier demolition and longer dehumidification. Carriers like State Farm, Allstate, USAA, Farmers, and Liberty Mutual may question coverage if you don’t mitigate promptly. See restoration costs.
Will homeowners insurance cover burst pipe damage if I didn’t notice it right away?
Often yes, but the delay can cut into coverage. Most carriers (State Farm, Allstate, USAA, Farmers, Liberty Mutual) cover sudden pipe bursts, but they may deny or reduce payment for “neglect” if the leak ran for 48+ hours and caused avoidable mold or rot. You’ll also need proof you acted promptly: shut off the main, documented damage, and called an IICRC-certified water restoration team. Cat 2–3 contamination and demo can push total losses into the $5,000–$25,000+ range. See burst pipe repair.
How long does it take to dry out a house after a burst pipe, and when does mold start?
With IICRC-certified drying, most burst-pipe losses take about 3–7 days to dry (sometimes 10–14+ days if water reached insulation, subfloors, or multiple rooms). Mold can start in as little as 24–48 hours on wet drywall, carpet pad, and framing—so waiting 48 hours often turns a simple cleanup into demolition and containment. Many carriers (State Farm, Allstate, USAA, Farmers, Liberty Mutual) expect prompt mitigation; delays can raise out-of-pocket costs from roughly $1,500–$5,000 to $10,000–$30,000+. See burst pipe repair.
Can I dry out burst pipe water damage myself, or do I need a plumber and restoration company?
You can shop-vac and run fans for small, clean (Category 1) leaks caught immediately, but burst pipes usually soak walls, insulation, and subfloors within minutes. After 24–48 hours, moisture can drive mold risk and turn into Category 2/3 contamination, making DIY drying unreliable. Call a licensed plumber to stop the source and an IICRC-certified restoration team for extraction, dehumidification (often 3–5 days), and documentation for carriers like State Farm, Allstate, USAA, Farmers, or Liberty Mutual. Waiting can push costs from roughly $1,500–$5,000 to $10,000+; see restoration cost factors.